Table of Contents
- What are Cooleaf events?
- How do I create an event?
- How do I edit an event?
- How do I extend an event?
- How do I cancel an event?
- How do I add a sign-up list to an event?
- How do I clone an event?
- How can I send an event reminder?
- How do I award reward points for an event?
- How do I download an event report?
- How do I download a sign-up list report?
Manage Events (Admin)
- What are Cooleaf events?
- How do I create an event?
- How do I edit an event?
- How do I extend an event?
- How do I cancel an event?
- How do I add a sign-up list to an event?
- How do I clone an event?
- How can I send an event reminder?
- How do I award reward points for an event?
- How do I download an event report?
- How do I download a sign-up list report?
What are Cooleaf events?
The Cooleaf event feature allows Local Admins and Admins to create a calendar-based invitation to a virtual or in-person event. You can also award reward points for event attendance.
Use the Events page in Manage view to create and manage Cooleaf events.

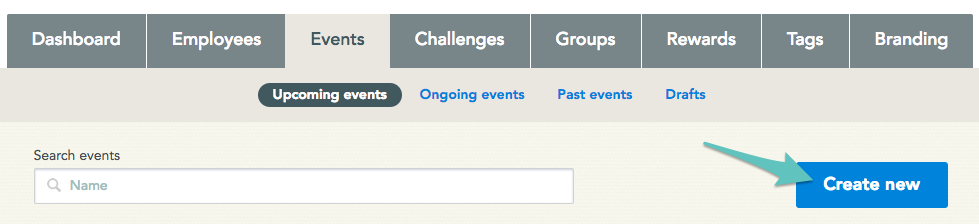
How do I create an event?
From the Events page in Manage view, click the blue button that says ‘Create new.’
On the next page, choose an event photo and enter the following details:
- Enter a name for your event (required).
- Enter a description for your event (required).
- Select the start and end times for your event.
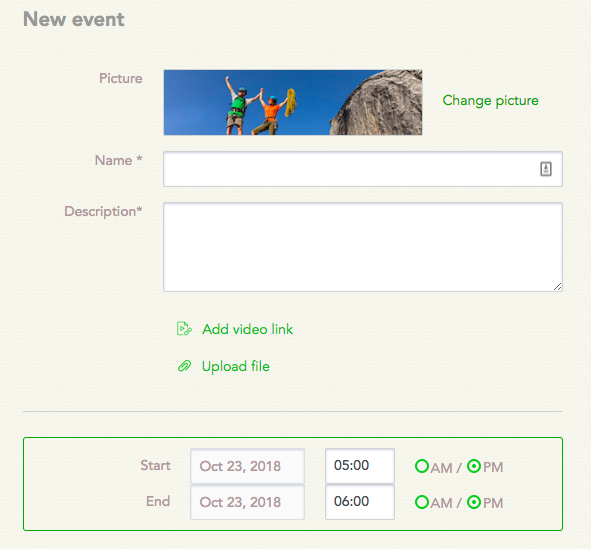
If this event will take place multiple times (such as a monthly happy hour), you can choose to add additional sessions for the event.

Next, click to choose between an in-person or virtual event. Enter the event’s location (optional).

Targeted For: If you’d like this event to target only a specific group or team, click to choose a group or team.
Next, enter the name and contact information for the event coordinator. This person will be the main point of contact for the event.
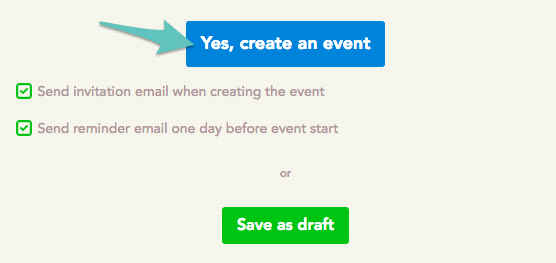
Before creating the event, review additional options:
- Check if you’d like to include instructions in the confirmation email.
- Check if you’d like to set a maximum capacity for the event.
- Check if you’d like to add reward points for attending.

Finally, click the blue button to create the event! Or, click the green button to save the event as a draft to publish later.
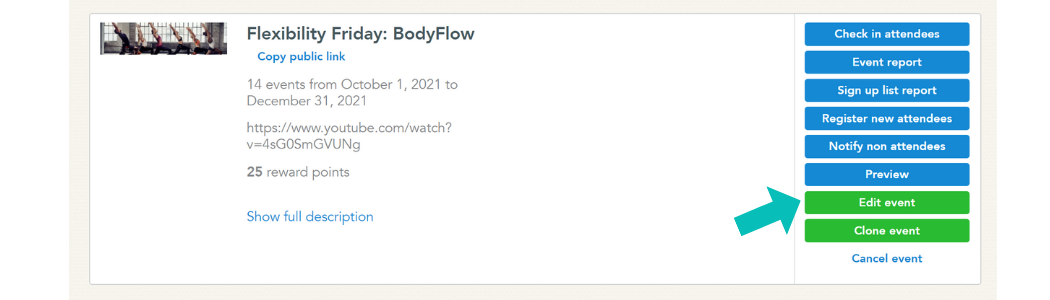
How do I edit an event?
- From the Events page in Manage view, find your event on the list of upcoming events.
- Click the green button that says ‘Edit event’.
- Modify the details of your event, then click the blue button that says ‘Update an event.’
How do I extend an event?
After an event has started, the event dates cannot be changed. The dates of the event can only be changed before the event has started. To change the dates of an event that has not yet started, follow the instructions above to edit an event.
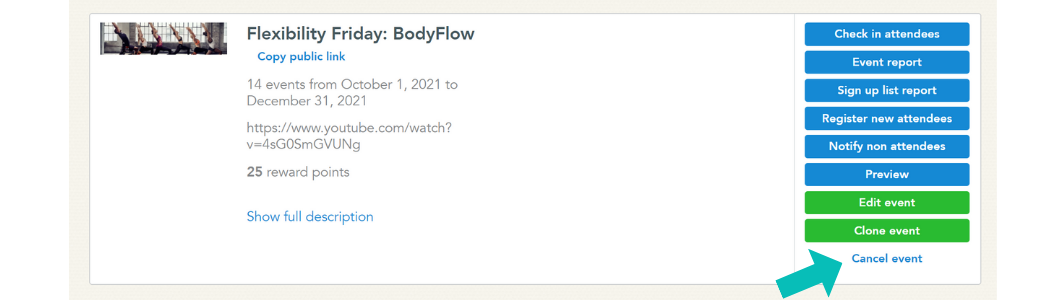
How do I cancel an event?
- From the Events page in Manage view, find your event on the list of upcoming events.
- Click ‘Cancel event’.
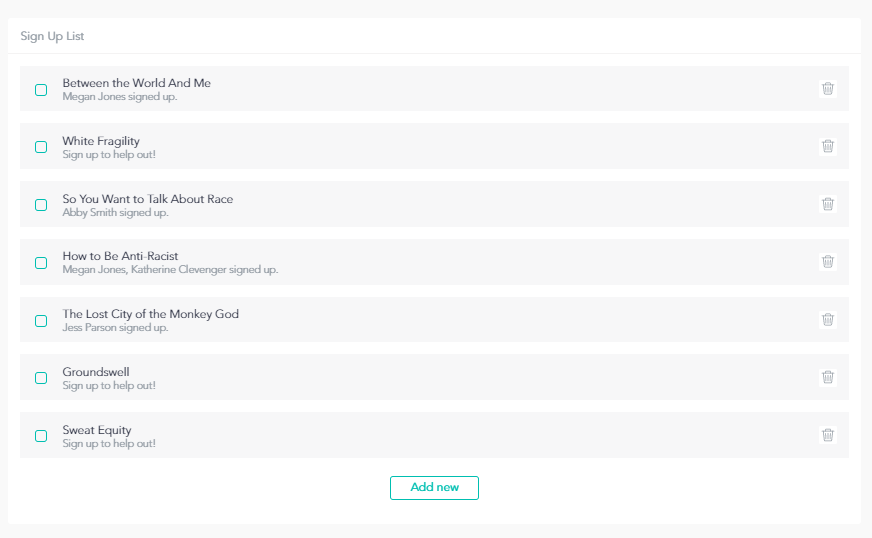
How do I add a sign-up list to an event?
Once an event has been published, you are able to add a sign-up list for participants to the event.
- Go to the published event on the activities page of Cooleaf.
- Select the event you'd like to add a sign-up list too.
- Scroll down and click 'Add new' under Sign Up List.
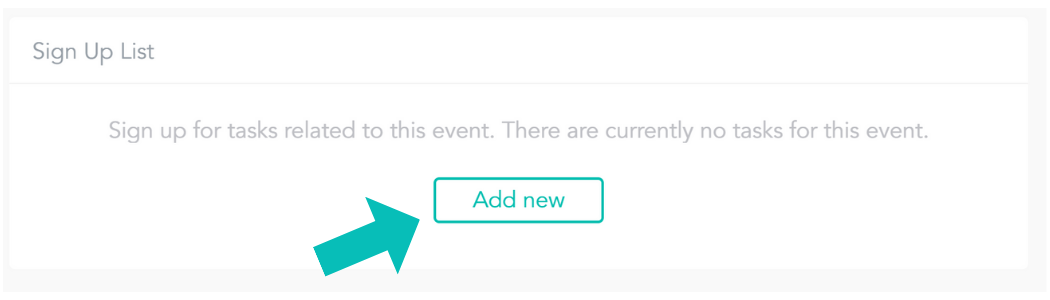
- Add the tasks or items you'd like to add.
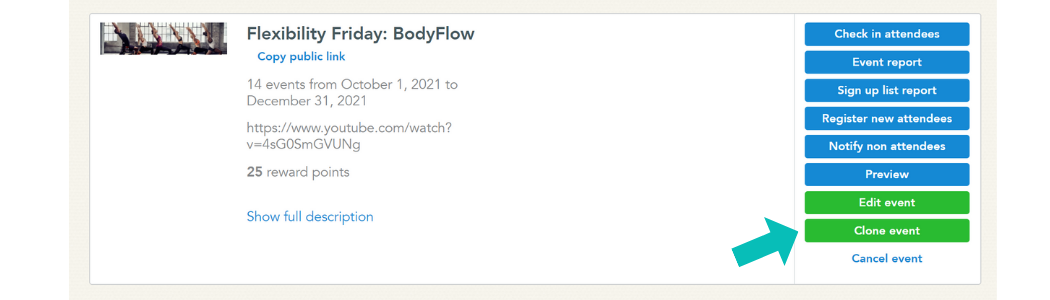
How do I clone an event?
“Cloning” allows you to duplicate a previous event in order to create a similar event.
- From the Events page in Manage view, find your event on the list of upcoming, ongoing, or past events.
- Click the green button that says ‘Clone event’.
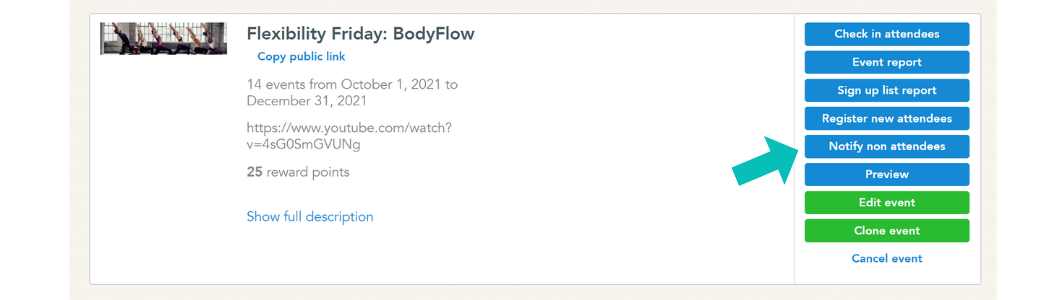
How can I send an event reminder?
If you’d like to remind users to sign up for an upcoming event, you can send an event reminder.
- From the Events page in Manage view, find your event on the list of upcoming events.
- Click the blue button that says ‘Notify non attendees’. This will send a notification to all employees who might be interested in the event but haven’t yet registered.
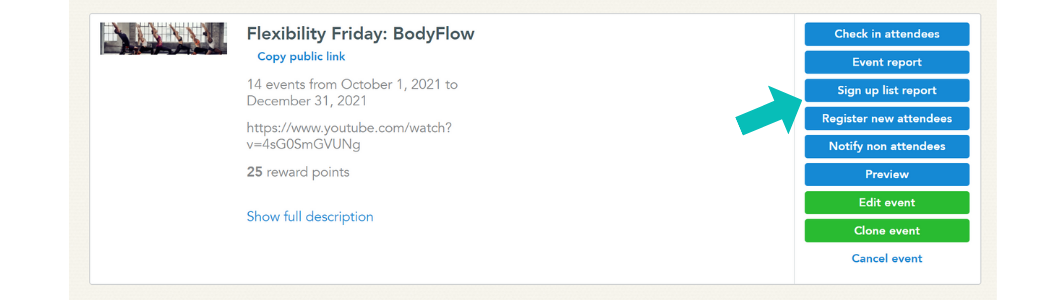
How do I award reward points for an event?
Event reward points must be manually awarded by an Admin or Local Admin.
After the event, go to the Events page in Manage view to manually ‘check in’ attendees. Checking in event attendees confirms attendance and awards any reward points associated with the event.
To check-in event attendees, follow the steps below.
- From the Events page in Manage view, find your event on the list of past events.
- Click the blue button that says ‘Check-in attendees’
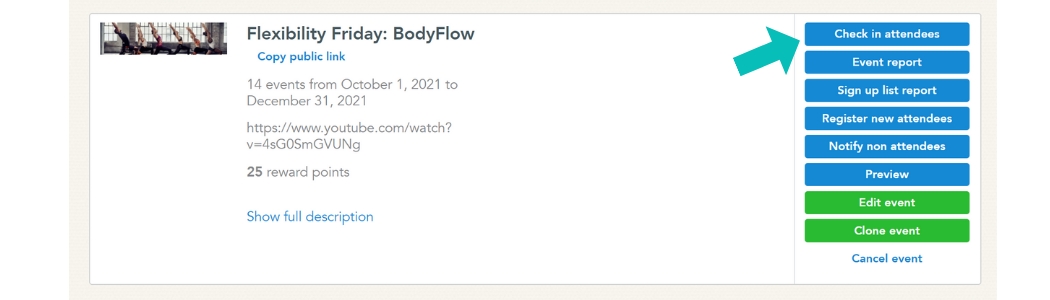
- Check in any users who participated in the event.
- Click the blue ‘Submit’ button.

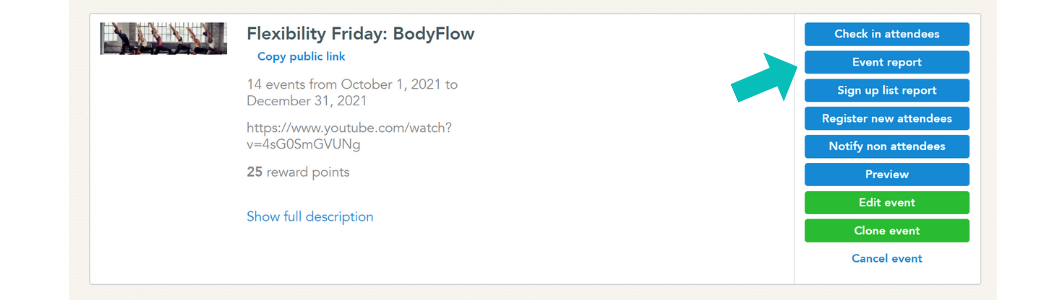
How do I download an event report?
To download an Event report with a list of users who registered and attended the event, follow the steps below.
- From the Events page in Manage view, find your event on the list of current and past events.
- Click the blue button that says ‘Event report.’ The report will automatically be sent to your email address.
How do I download a sign-up list report?
To see the list of items event attendees signed up for, follow the steps below to download a sign up list report.
- From the Events page in Manage view, find your event on the list of current and past events.
- Click the blue button that says ‘Sign up list report.’ The report will automatically be sent to your email address.