Table of Contents
Recognitions and Posts
![]() Updated
by The Cooleaf Success Team
Updated
by The Cooleaf Success Team
Recognitions and posts are a great way to connect with your community through the main feed. Recognitions allow you to "shout out" 🗣️ colleagues for a job well done, while Posts are for sharing general news and announcements.
Recognitions
At Cooleaf, we encourage meaningful recognitions. Recognition doesn’t just make you feel good – it also makes your whole company stronger! 💪 Giving and receiving recognition leads to happier and more collaborative teams. Read a success story here!
There are many reasons to recognize a colleague. Perhaps they've exceeded expectations on a task or project, delivered an exceptional customer experience, or innovated to streamline internal processes.
As you compose your recognition, remember to follow the P A T H:
- Personal Connection: Make it personal; connect on a human level.
- Align with Values: Tie their actions to your organization's values, mission, or purpose.
- Timely: Recognize promptly to capture the moment.
- Highlighting Impact: Showcase their impact or outstanding efforts.
For more tips and tricks, check out Cooleaf's recognition blog post:
Create a Recognition
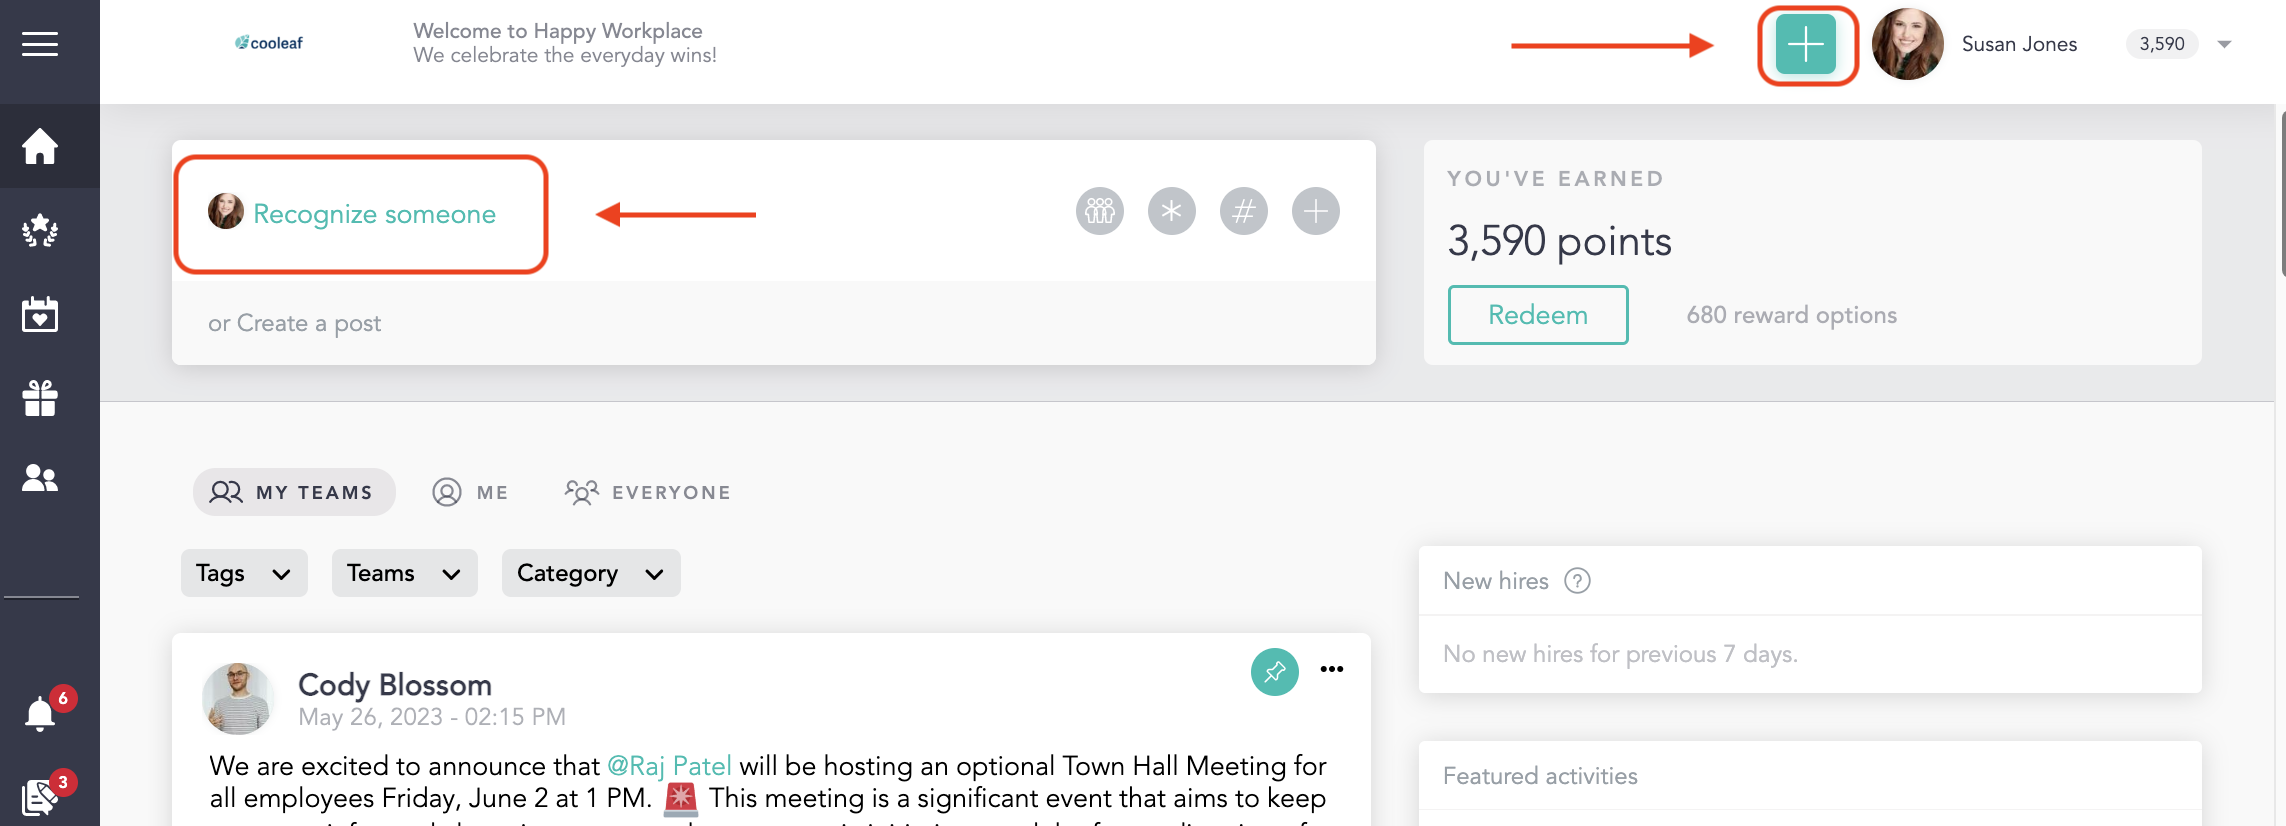
- To begin a recognition, you can either select recognize someone at the top of the user dashboard or tap the plus button ➕ at the top right corner of your screen on any Cooleaf page.
 Mobile: Tap the plus button at the bottom-center of your device to begin a recognition.
 - In the pop-up box, begin typing to find the person or people you'd like to recognize.
- Next, click on the box below "Why are they awesome?" to give a detailed description of your recognition. You can even jazz it up by using the formatting tools, adding emojis, pictures, GIFs, or use the @ symbol to mention someone! Learn more about all of those tools here!When giving peer recognition, remember to be authentic and specific in your praise. You might be surprised to see how much of a difference it makes!
- Select add a tag and choose an appropriate tag from the provided options in the drop-down. The tags typically match your company's core values, or are connected to an ongoing challenge or event. To learn more about tags, look here!You must select a tag to complete your post. If a tag is not selected, the recognize button will stay grayed out. Your recognition is ready to post when the recognize button turns teal.
- If you are a manager or admin, you may see additional options: add an award and add points. Click the award icon to add an award to your recognition. If there are points associated with this award, the points will automatically populate in the "add points" box.Each organization determines who can distribute points and how often. If you have permission to issue points through your organization and are unable to do so, please contact support@cooleaf.com.
- Determine who should see this recognition. We recommend posting recognitions publicly by selecting everyone, so that your entire organization can see those wins! But sometimes, you might want to keep a recognition private.
To recognize someone privately, click selected people only. This means that your recognition will only be shown to the person you're recognizing (and anyone mentioned).
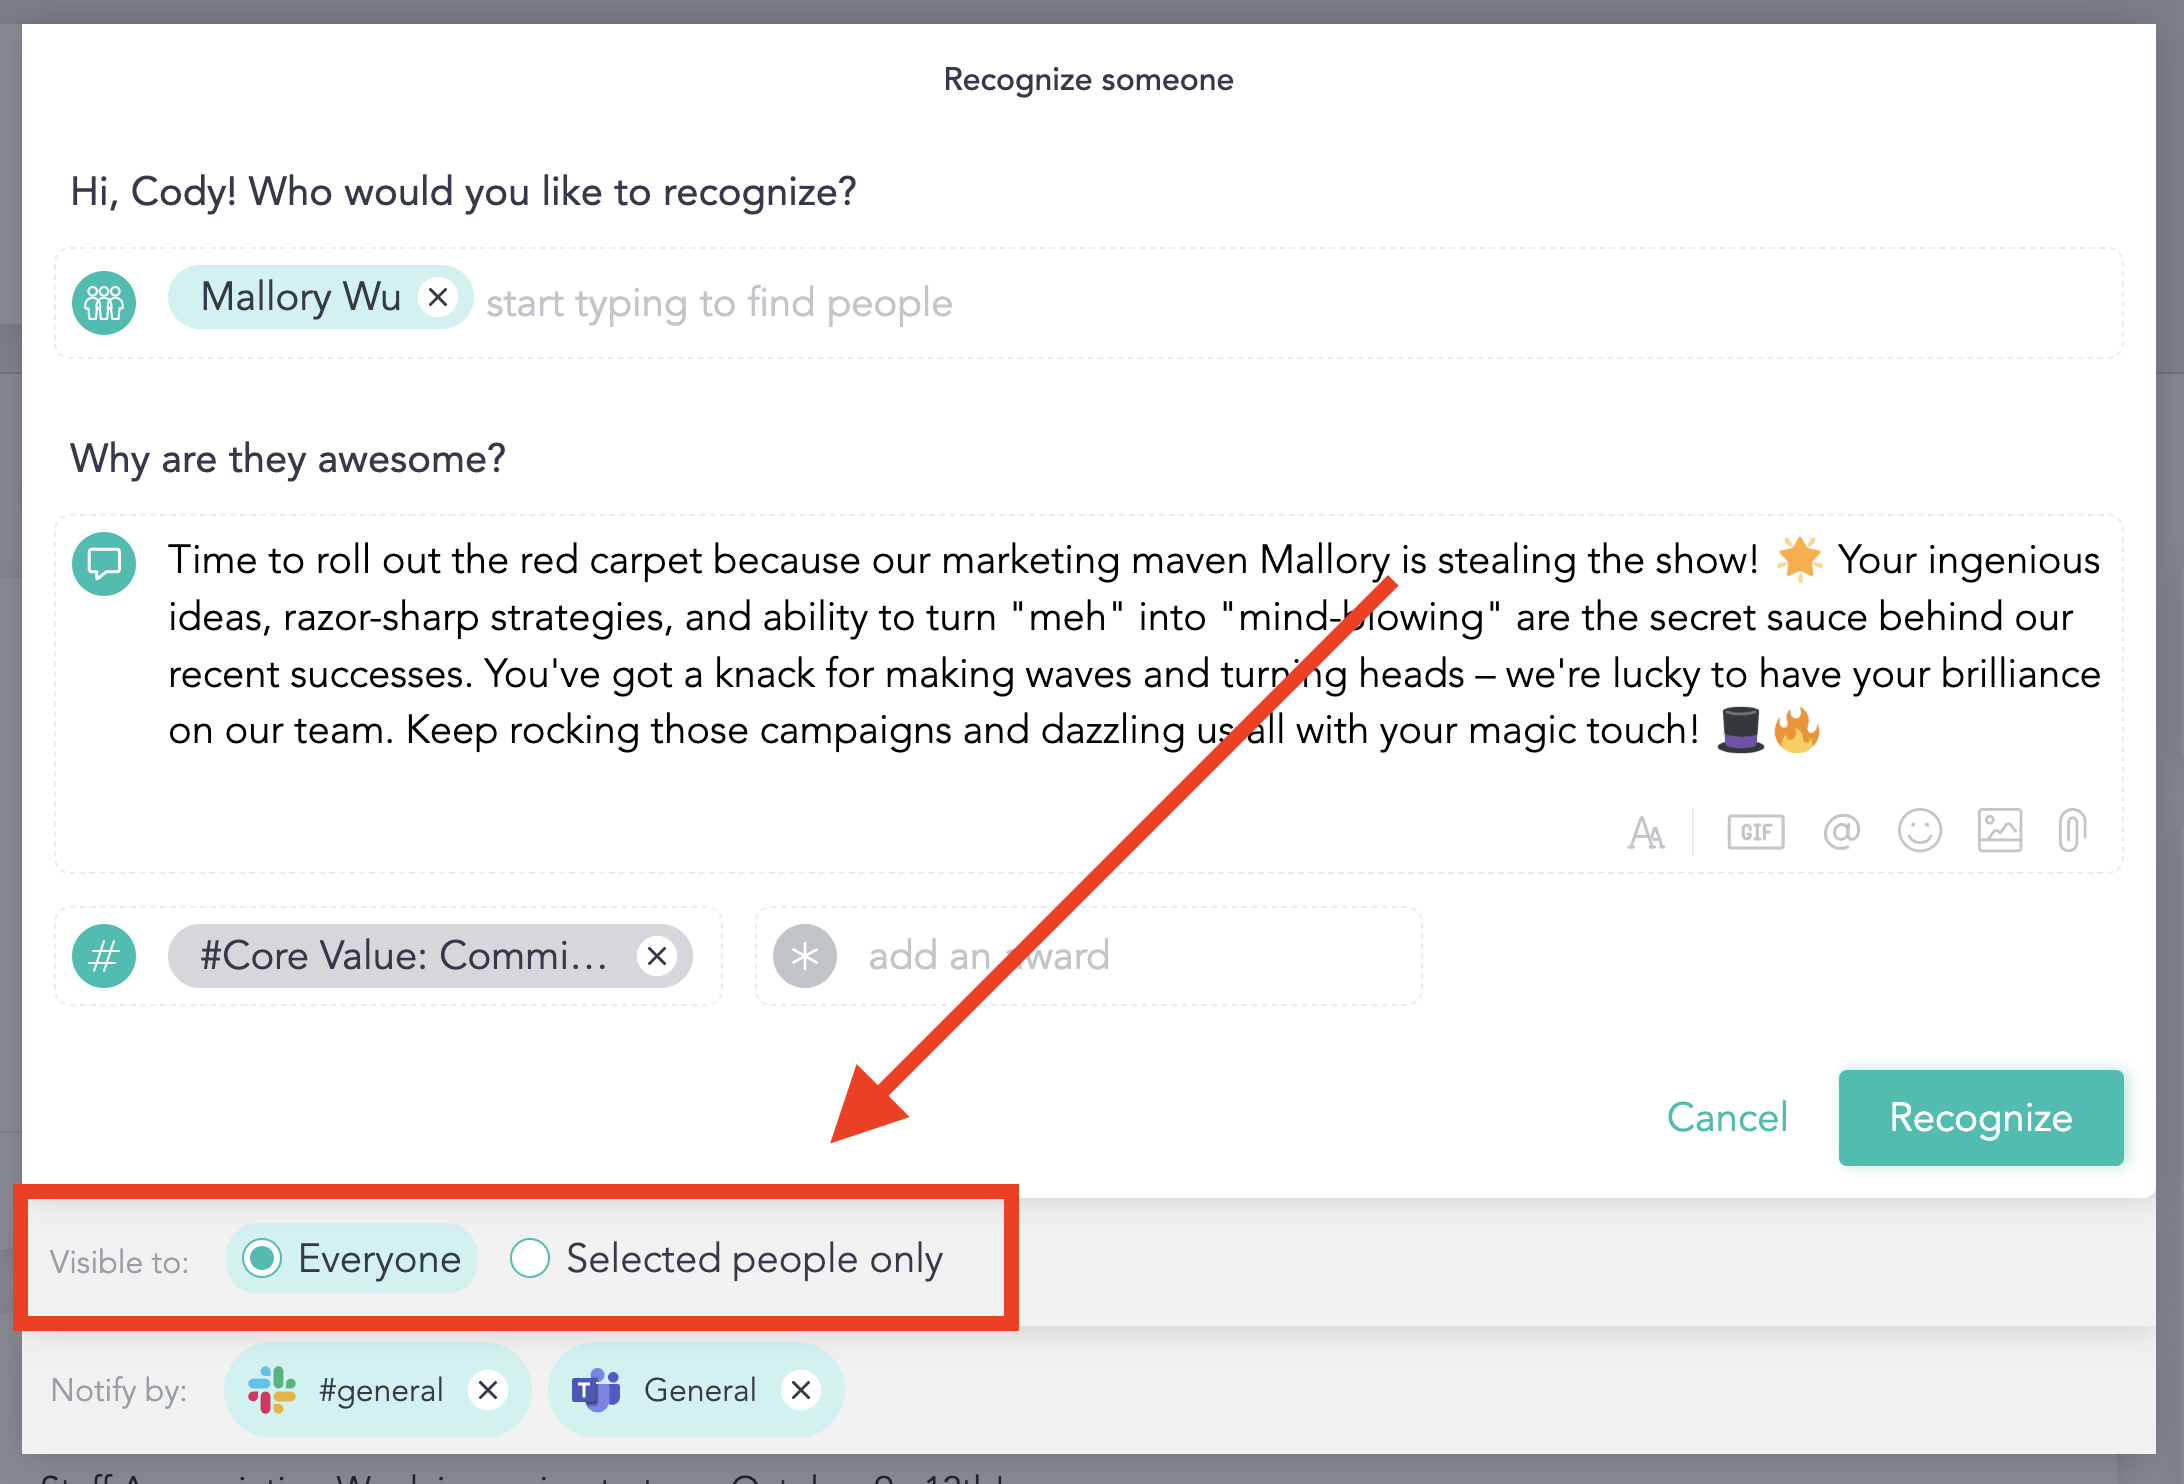
- If your organization has Slack, MS Teams, Google Chat, or Facebook Workplace enabled, you'll see an icon at the bottom of your post next to Notify by. This icon means that your recognition will be automatically posted within this communication channel or delivered via email. If you don't want your recognition to show up in that channel, you can click the x to disable it.
- Click Recognize! The person or people you're recognizing will receive a notification that they've been recognized. 🎉
Posts
Posts are a way to share general news and announcements and are not tied to points. Your organization might have guidelines over who has access to create posts. Contact your organization's Cooleaf administrator with questions about user permissions.
Posts can be used for:
- Reminding everyone of an upcoming challenge or event.
- Alerting the company of a new or updated policy.
- Announcing a new Cooleaf discussion group!
- Sharing an important or exciting life update with your colleagues! 🏡🍼💍🐕🎉
Create a Post
- To create a post, you can either select create a post at the top of the user dashboard under recognize someone, or tap the plus button ➕ at the top right corner of your screen on any Cooleaf page.
 Tapping the + button will default to create a recognition. To create a post from here, click on the create post tab at the top of the popup box.
- In the pop-up box, begin typing your announcement. You can make your post exciting by using the formatting icons in the bottom right corner of the text field. You can also add emojis, photos, and gifs to your post!
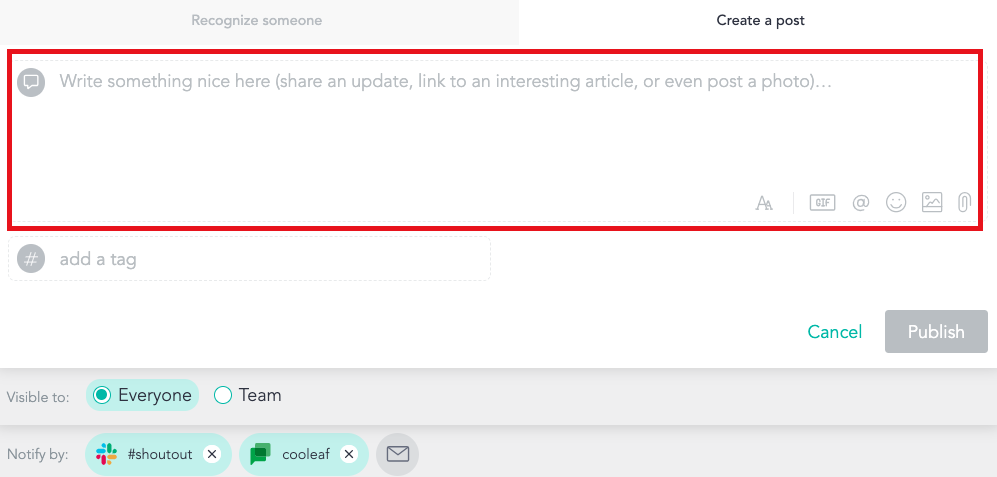
- To complete the post, select a tag from the dropdown by clicking in the add a tag field. This will categorize your post and make it searchable later through the filtering tools on the main feed. To learn more about tags, look here!
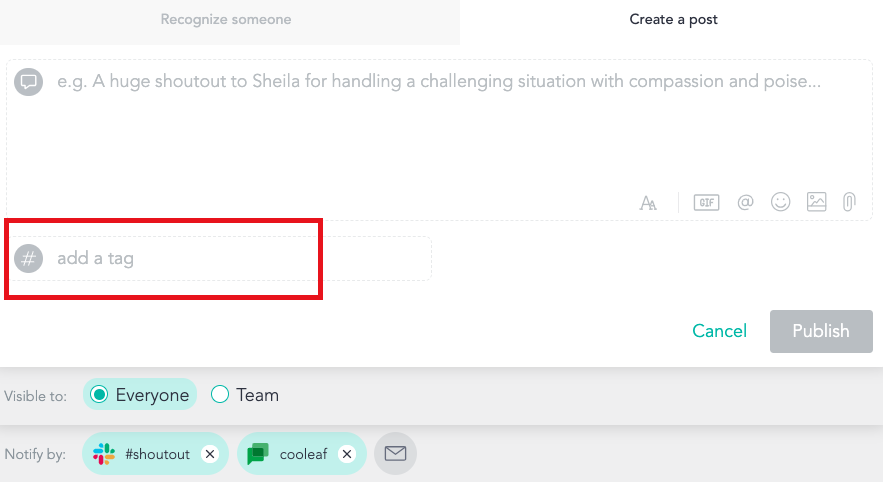 You must add a tag in order to post. Without a tag, the publish button will remain inactive.
 - Determine who should see this post by selecting everyone or team.
- To share with a specific team, select team and type the @ symbol. A dropdown will appear with teams in your organization and you can type the name of the team to select.
- If your organization has Slack, MS Teams, Google Chat, or Facebook Workplace enabled, you'll see an icon at the bottom of your post next to Notify by. This icon means that your recognition will be automatically posted within this communication channel or delivered via email. If you don't want your recognition to show up in that channel, you can click the x to disable.
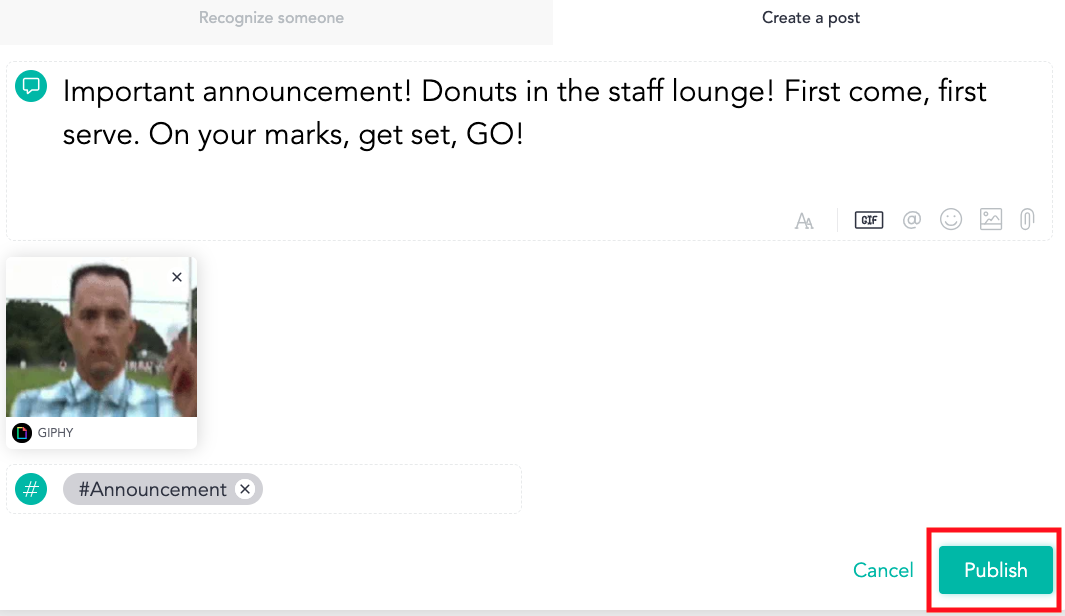
- To complete your post, click publish! Now your post will show up on the main feed of the audience you selected.
Update or Edit your Content
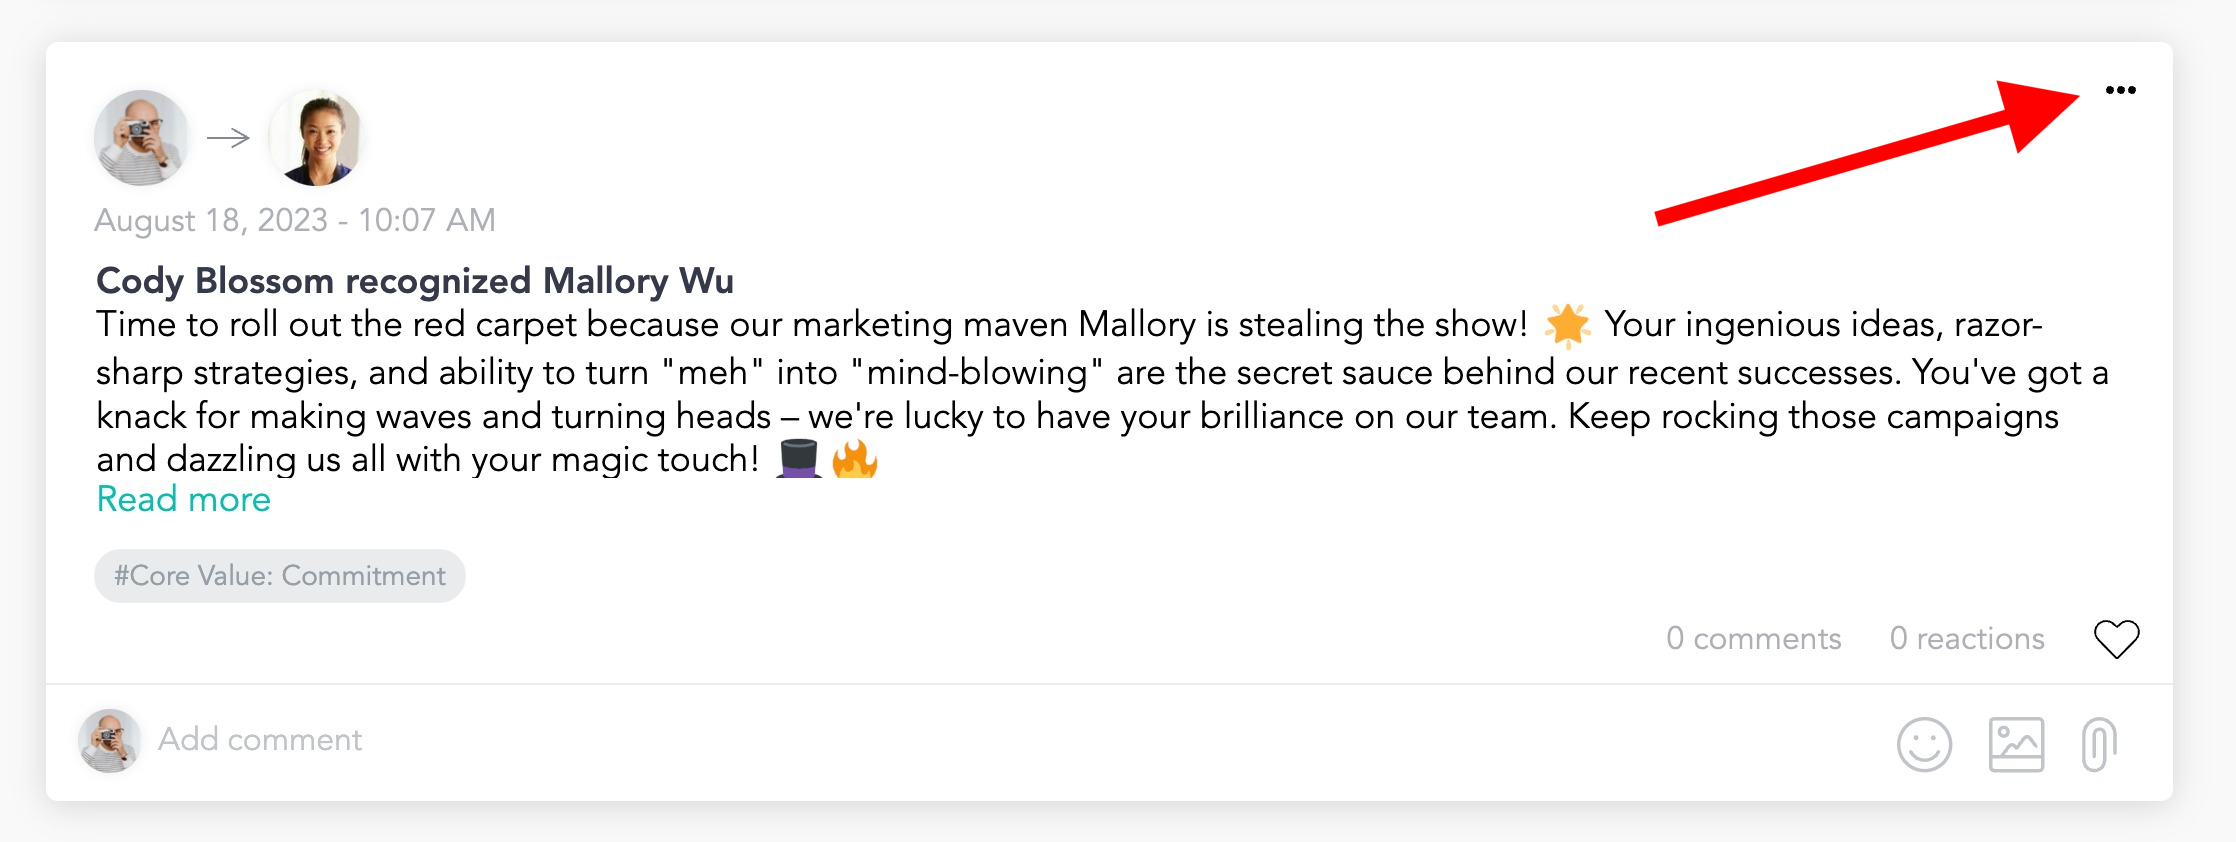
If you need to edit or update the content of your post or recognition because you are correcting spelling or maybe adding in some fun new emojis, you can easily do that with the three dots!
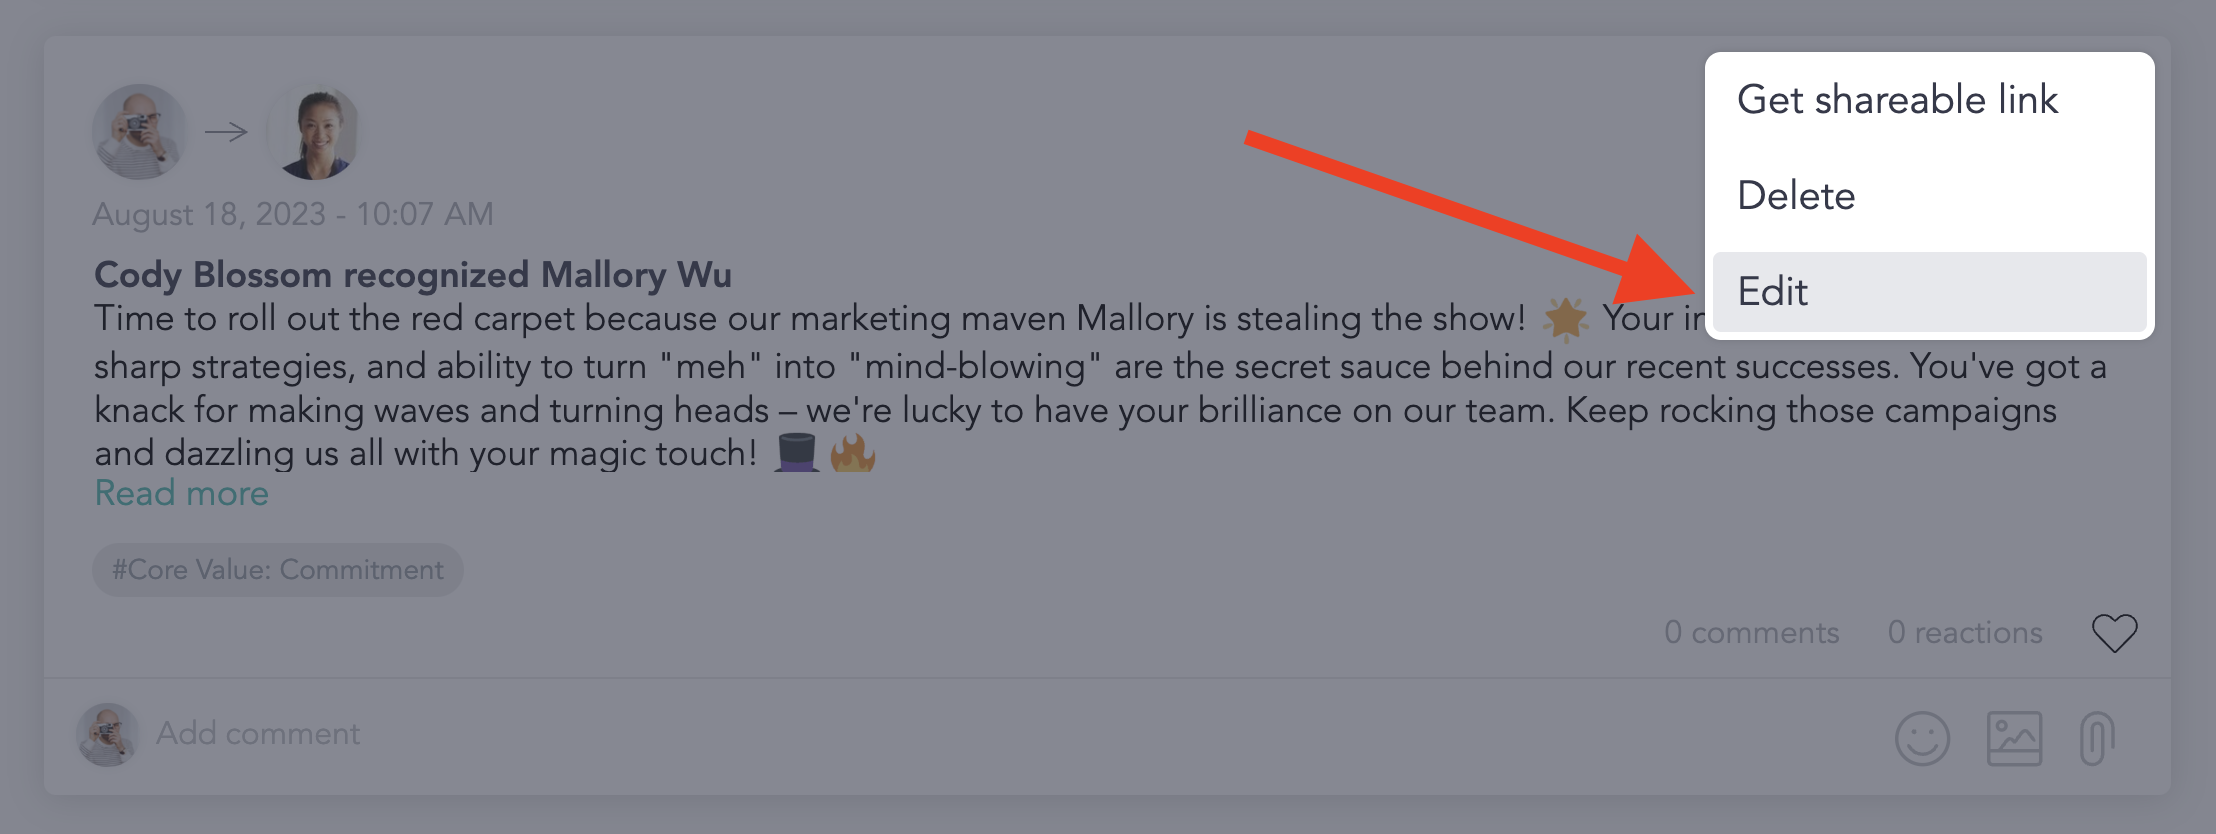
- To edit what you’ve created, find and click the three dots in the right corner of your post.
- In the dropdown menu, select 'Edit.'
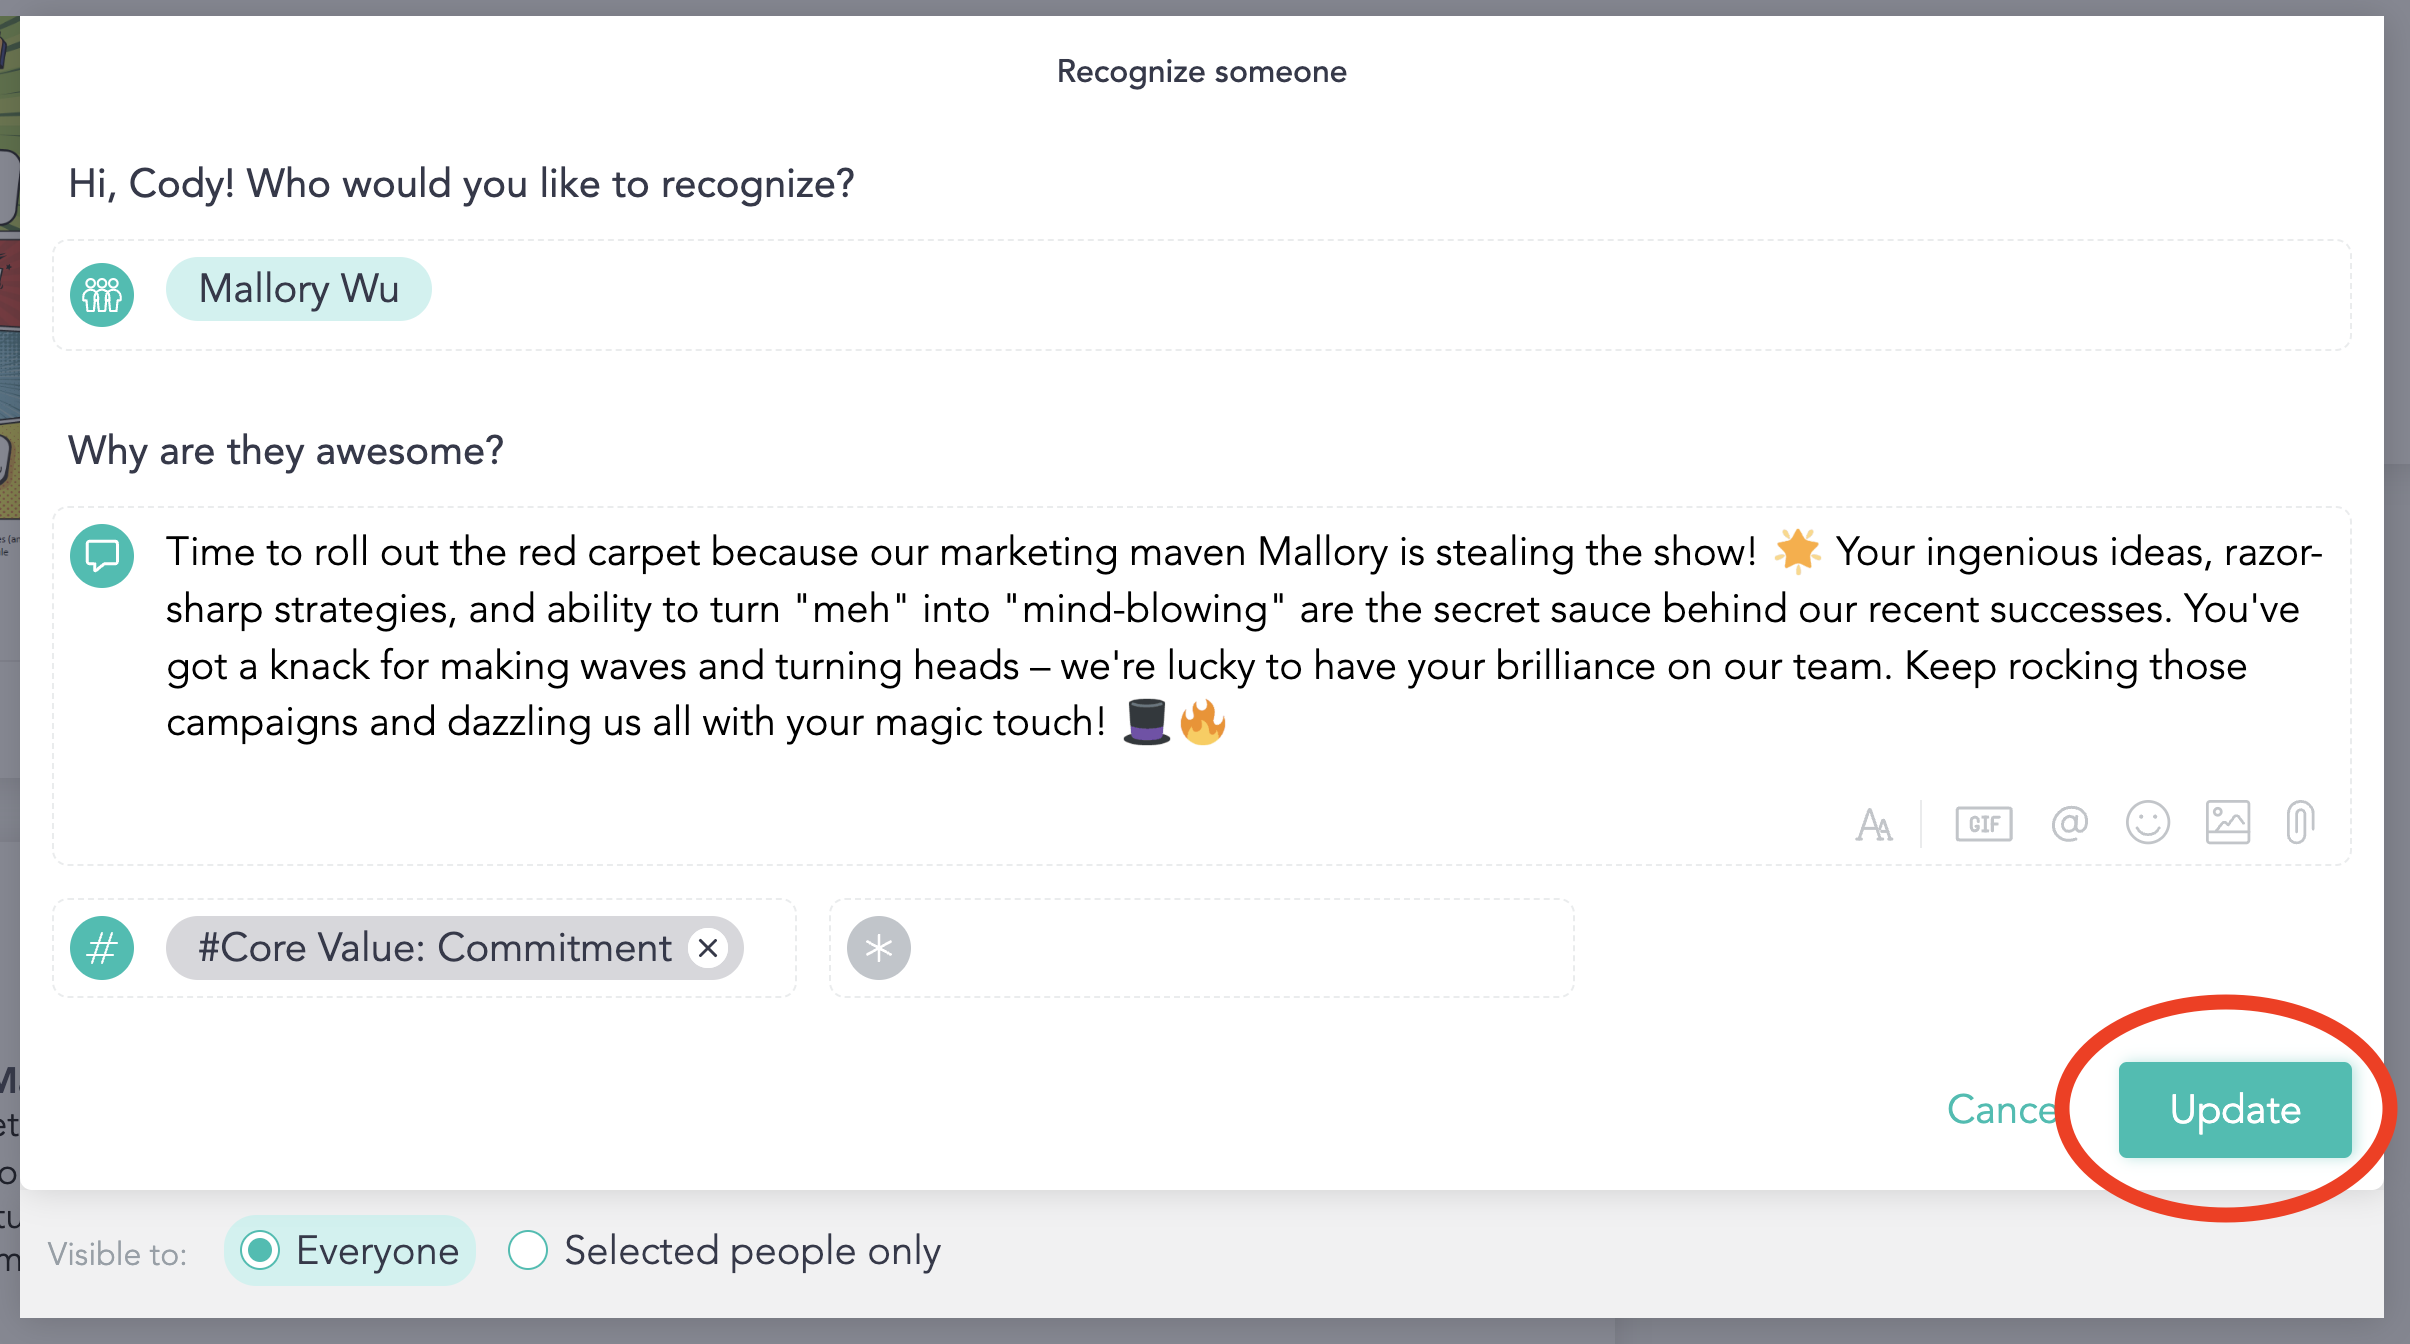
- Make any changes, then click 'Update.'
Delete your Content
If you need to delete your post or recognition, you can easily do that with the three dots!
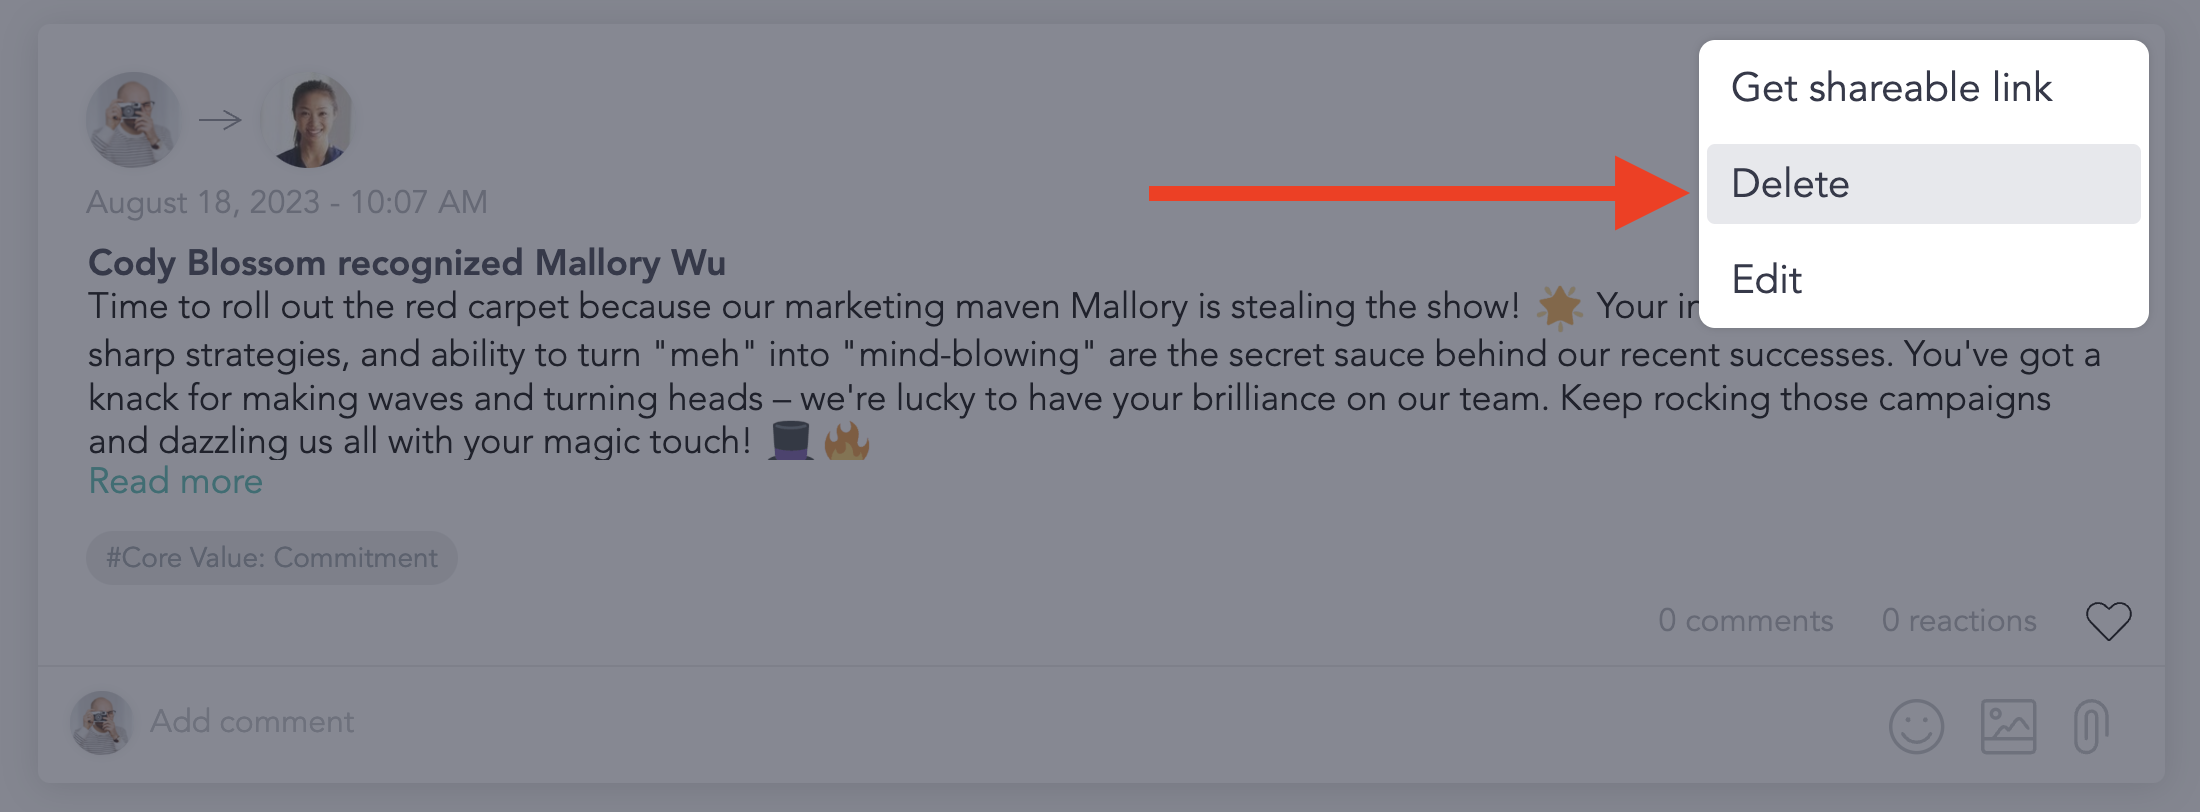
- To delete what you’ve created, find and click the three dots in the right corner of your post.

- In the dropdown menu, select 'Delete'.
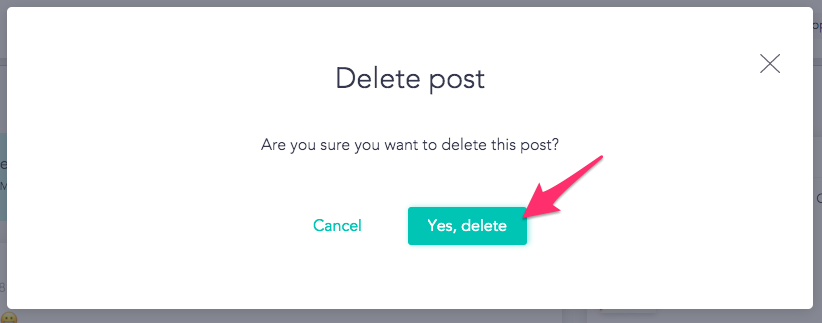
- A pop-up will ask you to confirm that you wish to delete the post. In the pop-up, click 'Yes, delete.'
Tags
A tag is required for both posts and recognitions. Tags help categorize and organize the posted content within your platform. Tags are specific to each organization and managed by your leadership team. You may find tags related to your company’s core values, ongoing initiatives, weeks of celebration, or even something else! Choose the tag from the drop-down that best aligns with your recognition or post.
Examples:
- #Core Value: Ownership
- #Learning & Development
- #Celebration
- #Health and Well-being
Help us Enhance our Support Articles! ⬇ ⬇ ⬇
If you found our article helpful and informative, please give it a 😍 rating. Your positive feedback fuels our efforts to provide excellent assistance. If you believe there's room for improvement, feel free to rate it with a 😐 or 🙁 and provide detailed feedback. Your insights are invaluable in helping us create even better content for you in the future. Thank you for contributing to our continuous improvement!