Table of Contents
Manager Panel | Scheduling Tool
![]() Updated
by The Cooleaf Success Team
Updated
by The Cooleaf Success Team
The Scheduling Tool allows you to create a post or recognition that will publish in the future. This scheduling tool is more than just a convenient shortcut to queue up future posts or recognitions. This tool will help your overall platform management process, improve your efficiency so you have more time to push out great content, and develop a better connection with your organization in real time!
Accessing the Scheduling Tool
- Log in to Cooleaf.
- Select the blue person circle icon 👤 in the bottom left corner of your Cooleaf navigation.
- Select Manager Panel.
- Click Scheduling 🗓.
How to Schedule a Future Post or Recognition
- Once in the Manager Panel, you will select Scheduling 🗓 in the left navigation.
- In the top right corner, select Schedule New.
- A pop-up menu will ask you which type of post you would like to schedule; Post or Recognition.
Scheduling a Post
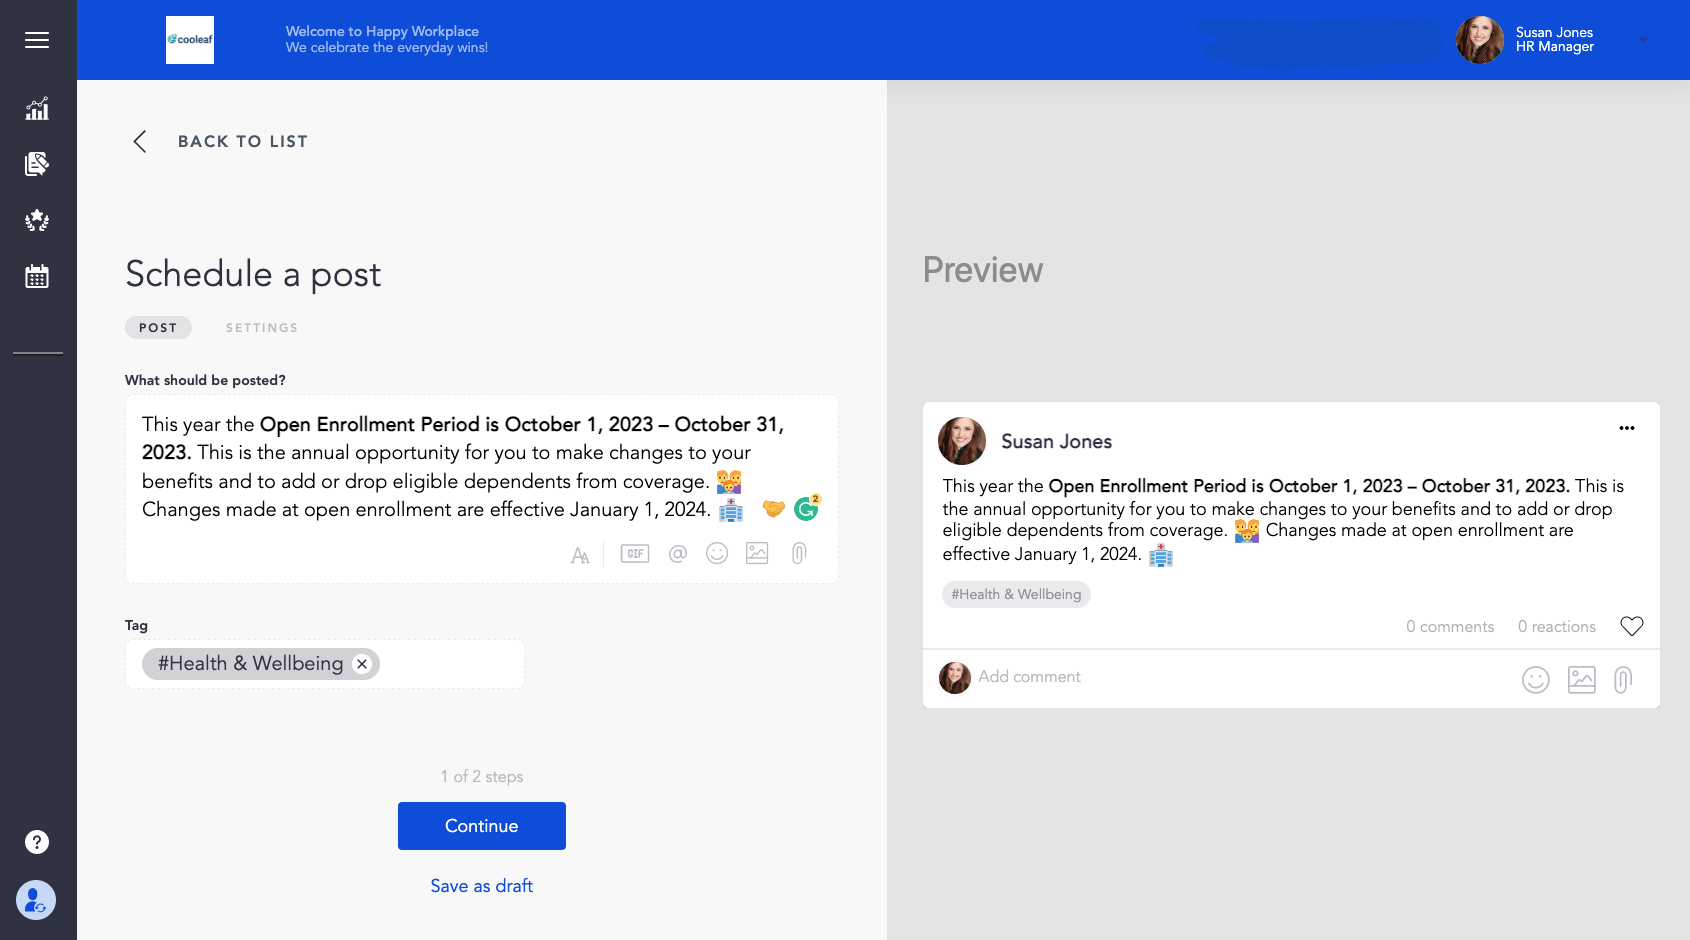
- Write your post, as you normally would, using 😁 emojis, gifs, attachments 📎, formatting, and more! You will see a preview of your post shown to the right when writing your post.
- Select the Interests Tag that is most suitable to your post.
- Select Continue to navigate to the setting, or save the post as a draft.
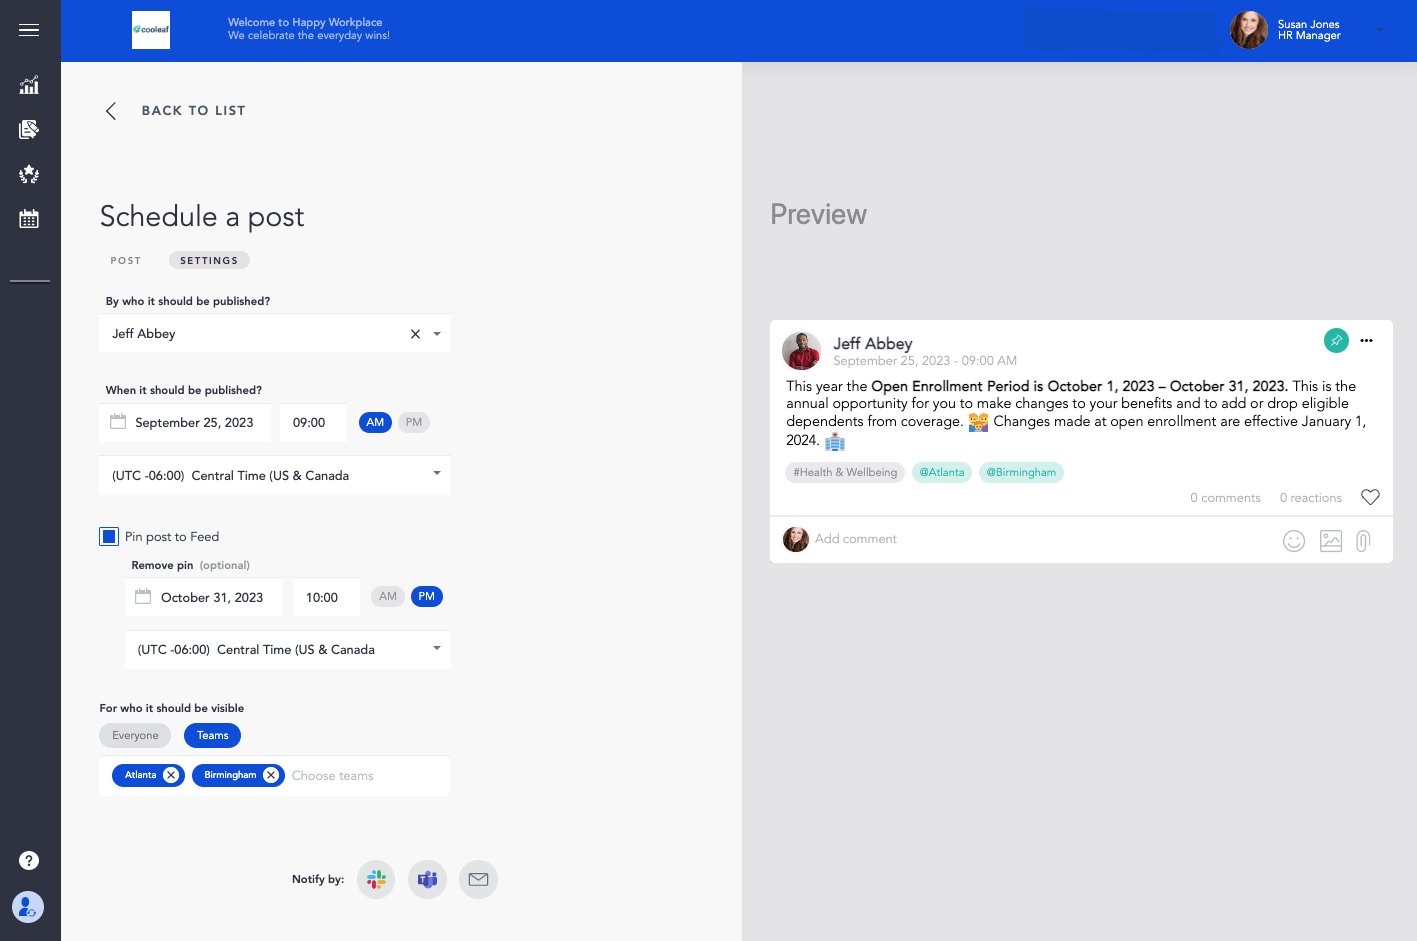
- Select who this post will come from. This feature allows you to impersonate anyone on the platform to share a post in their voice. This could be someone from your HR Team or maybe a VP or CEO of your organization. You can see that the Preview on the right will update as you make changes.
- Choose the date and time this post should be published. 📅 Be sure to select the time zone that best fits your organization.
- If you would like this post to be Pinned to your organization's main feed, select Pin Post to Feed. 📌 This will pin the post to your main feed on the day of the publish date. You will then set the date and time you want to remove the pin. This will automatically remove the post from being pinned to the top of your feed.If a post is currently pinned, or scheduled to be pinned at this time, you will receive a warning message that says, "Sorry, there can be only one post pinned at the same time. Would you like to replace the currently pinned post?" and you will have the option to view the post that is pinned and select No, cancel pinning or Yes, replace it.
- Identify to whom this post should be visible. Specific Team(s) or Everyone.
- If you have specific notification integrations set up, like Slack or MS Teams, you can select a few different notification options for your post.
- Now schedule your post by selecting Schedule! 🎉
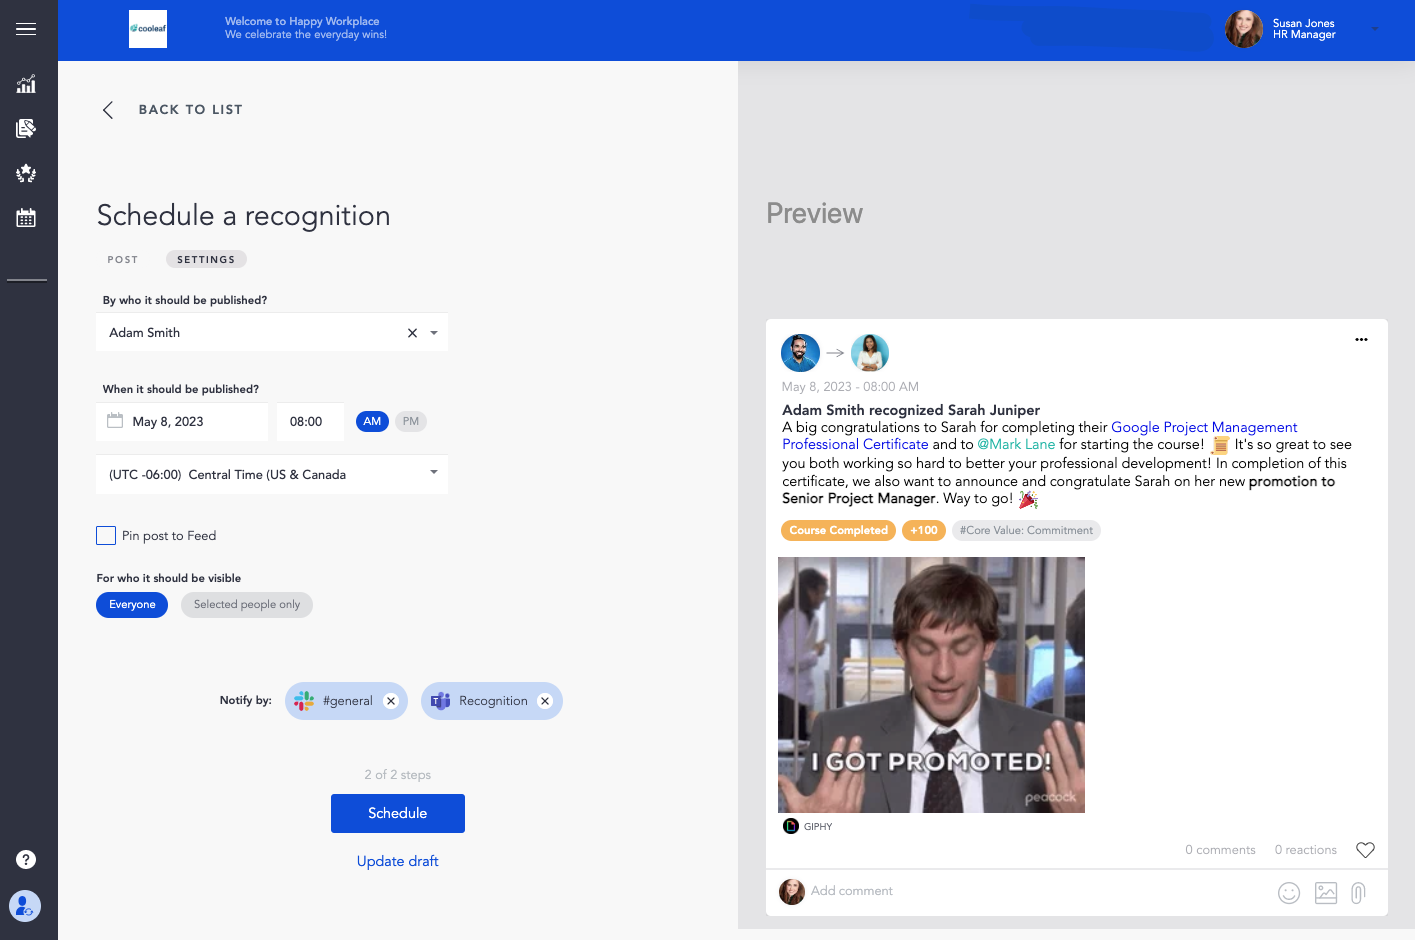
Scheduling a Recognition
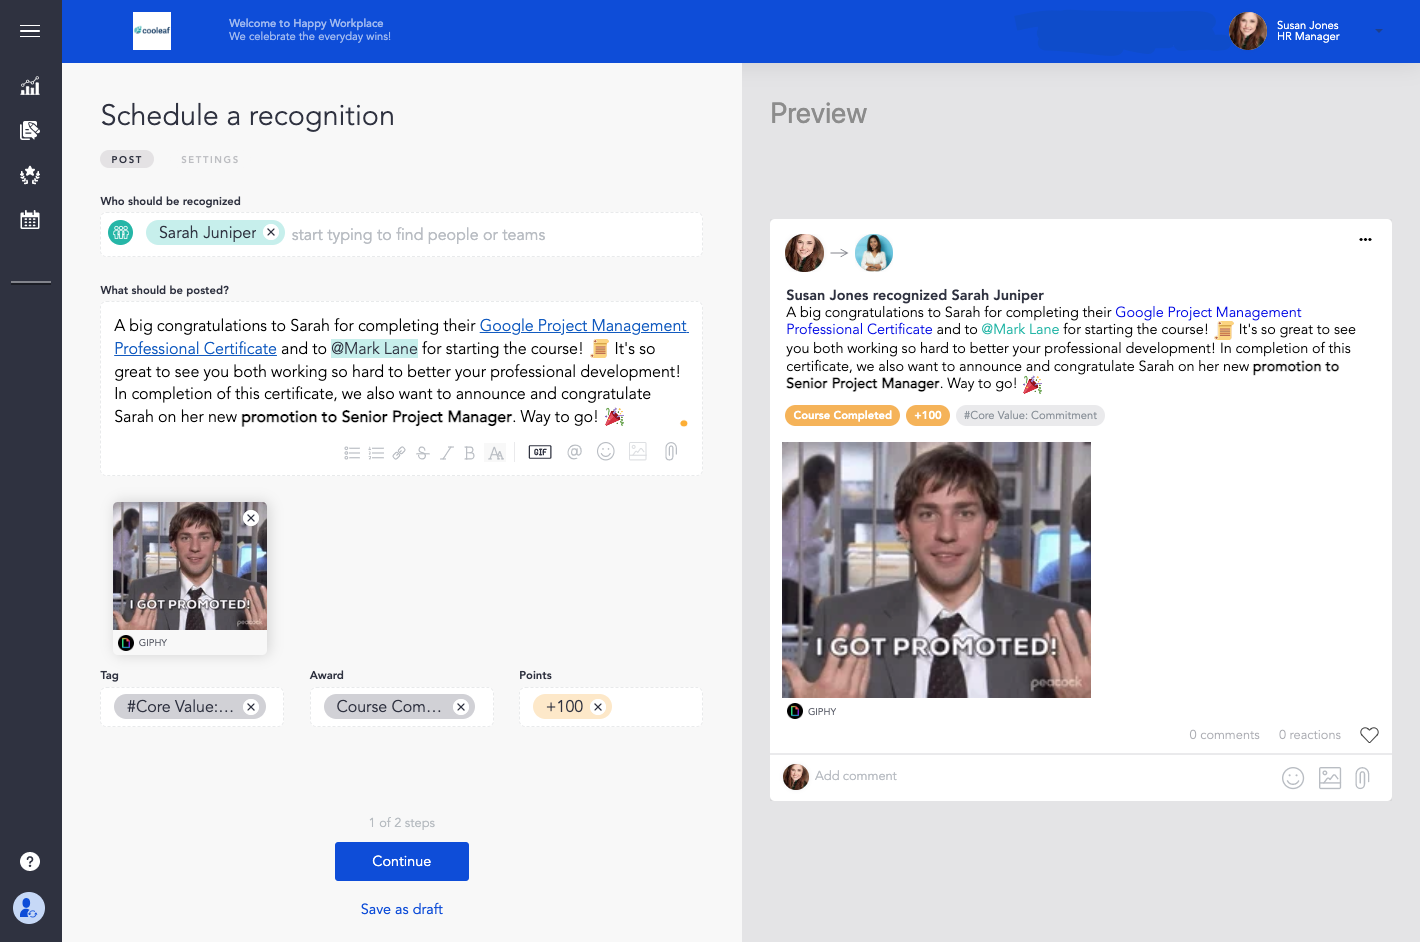
- Write your meaningful recognition, just as you would on the main feed, tagging an individual or a team, using 😁 emojis, gifs, attachments 📎, formatting, and more! You will see that a Preview of your post will be shown to the right when drafting your post.
- Select the Interests Tag that is most suitable to your post and attach any awards or points, if necessary.
- Select Continue to navigate to the settings, or save the post as a draft.
- Select who this post will come from. This feature allows you to impersonate anyone on the platform to share a recognition in their voice. This could be someone from your HR Team or maybe a VP or CEO of your organization. You can see that the Preview on the right will change and you make changes.
- Choose the date and time this recognition should be published. 📅 Be sure to select the time zone that best fits your organization.
- If you would like this post to be Pinned to your organization's main feed, select Pin Post to Feed. 📌 This will pin the post to your main feed on the day of the publish date. You will then set the date and time you want to remove the pin. This will automatically remove the post from being pinned to the top of your feed.If a post is currently pinned, or scheduled to be pinned at this time, you will receive a warning message that says, "Sorry, there can be only one post pinned at the same time. Would you like to replace the currently pinned post?" and you will have the option to view the post that is pinned and select No, cancel pinning or Yes, replace it.
- Identify to who this recognition should be visible. Everyone or the Selected People Only.
- If you have specific notification integrations set up, like Slack or MS Teams, you can select a few different notification options for your recognition.
- Now Schedule your recognition by selecting Schedule! 🎉
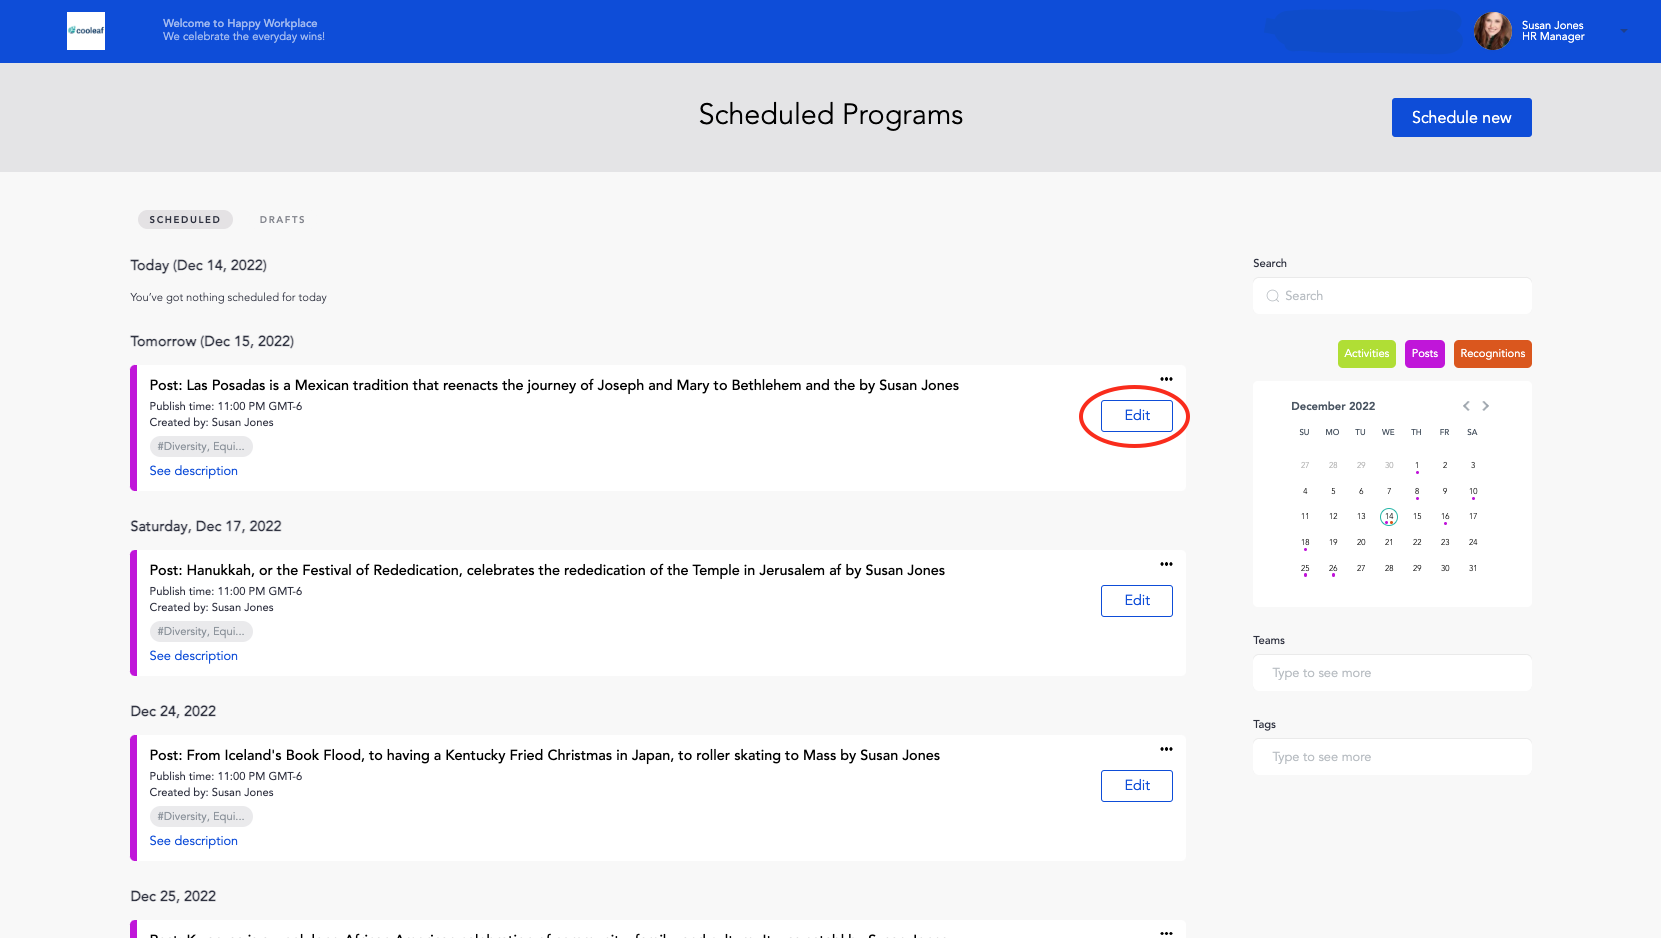
Editing a Scheduled Post
- Navigate to the Scheduling Tool 🗓 in the left navigation of the Manager Panel.
- Here you will see a full list of your scheduled posts and recognitions. Select "Edit" next to the post or recognition you would like to edit or update
- Make the necessary edits to the post and/or settings, review all is correct, select "Update"
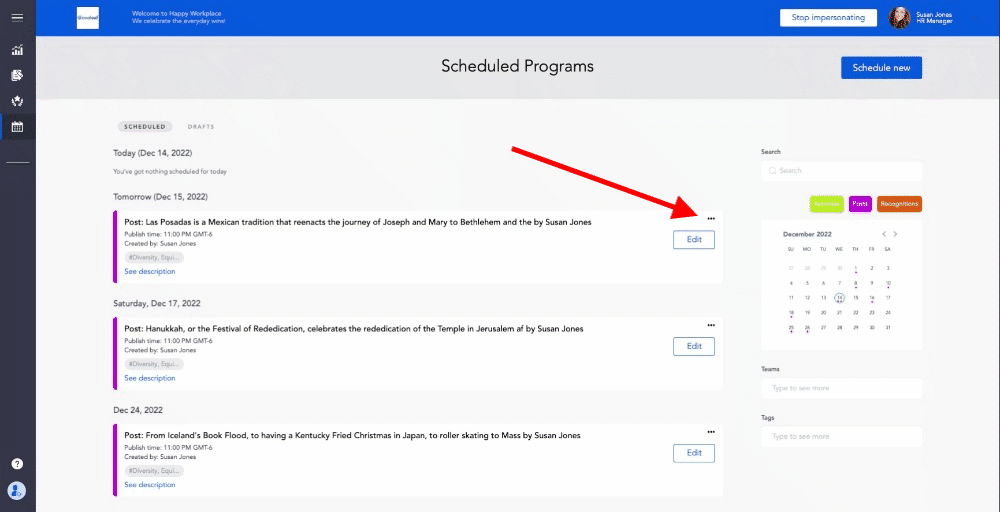
Removing a Scheduled Post
- Navigate to the Scheduling Tool 🗓 in the left navigation of the Manager Panel.
- You will see a full list of your scheduled posts and recognitions. If you would like to delete a post, select the 3 dots above the "Edit" button and select "Remove"
- The system will confirm that you want to remove the post. If confirmed, the post will be removed.
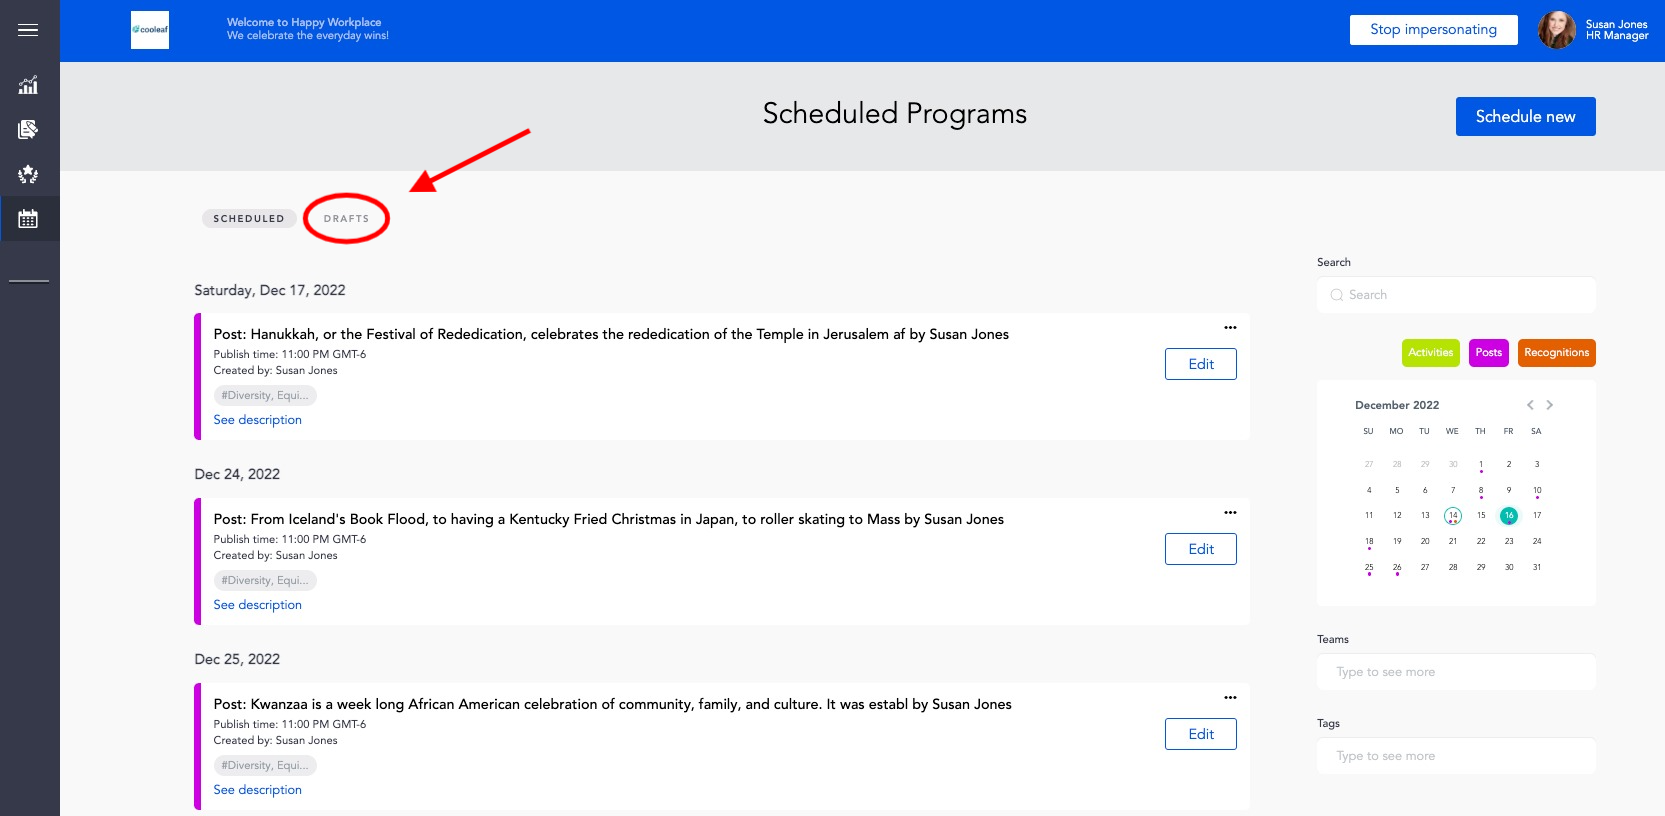
Accessing my Drafts
- Navigate to the Scheduling Tool 🗓 in the left navigation of the Manager Panel.
- At the top of the page, you can toggle between the Schedule or Drafts page
- Once on the Drafts page, you can remove the draft, select and make edits to your post/recognition, save and update the draft, or schedule the post.
How to View all Scheduled Posts & Recognitions
When you land on the Scheduling Tool page you can scroll to see all scheduled Post and Recognitions. If you would like to narrow your view, you use our Calendar, Teams, and Tags filter on the far right of the page. If you can't find a post you believe is scheduled, double-check the Drafts page as the post may have been saved as a Draft.